Server Cluster Recovery Utility: Recovering checkpoint files
From Cluster Server Recovery Utility
Recovering resource checkpoint files
Many applications and other resources store data in registry keys outside of the cluster database. Resource checkpointing is the process of associating a resource with one or more registry keys so that when the resource is moved to a new node (during failover, for example), the required keys are propagated to the local registry on the new node. This allows an application to store configuration data in the registry and have an up to date version of that data available, irrespective of where the application is hosted in the cluster.Resource registry checkpoints are setup by defining a sub-tree in the registry (in the HKEY_LOCAL_MACHINE hive) that is to be made available on all cluster nodes. Cryptographic keys are used by applications and stored in the registry as required. The cluster keeps a resource checkpoint file associated with each checkpointed registry key or crypto key on the quorum disk. Each file is used to save and restore the contents of the checkpointed key. The checkpoint files are found on the quorum disk under the quorum path as files with names *.CPT.
The following defines how the checkpoints are maintained:
- Whenever anything changes on the checkpointed registry tree and the resource is online, the Cluster service stores a copy of the tree in a resource checkpoint file on the quorum resource.
- A change made to a checkpointed key while the resource is offline will be overwritten with the checkpointed data when the application comes online.
- If the resource moves to another node, the Cluster service restores the registry tree from the quorum resource checkpoint file to the registry on the new node before the resource is brought online.
- If the resource is deleted, the checkpoint file is deleted.
The configuration data in the registry is typically required for an application to function correctly and it is important that the checkpoint file is correctly maintained and kept consistent and up-to-date with what the application expects. There are, however, a number of scenarios where the checkpoint file may be lost or become out of date:
- The quorum disk fails. In this case a new quorum disk may replace the old disk. The cluster database itself can be recovered using procedures defined in Recovery after a disk failure, however, this does not recover the checkpoint files. For applications to failover correctly with up-to-date registry data, the checkpoint files must be re-created.
- If the quorum disk fails the cluster database and checkpoint files can be restored from a backup. (In Windows .Net Server, the cluster database and checkpoint files are part of the system state and can be saved and restored using Automated System Recovery). In this case, the checkpoint files are restored; however, the contents may not reflect the current state in the registry. When the application that has associated checkpoints is brought on-line, the data in the registry will be over-written with the data from the checkpoint files. To avoid this issue, if the quorum disk is restored from a backup, you should delete all of the checkpoint files and re-create them using the Cluster Recovery Utility.
- The checkpoint files are accidentally deleted. This can be either due to operator error or a rouge application incorrectly deleting files.
- In some extreme failure cases (e.g. of the underlying disk IO subsystem hardware or software), files on the file system may become corrupt.
The Cluster Recovery Utility allows an administrator to re-create the checkpoint files for one or all resources on the cluster. It gathers the information to re-create the checkpoint files from the node that currently owns the resource.
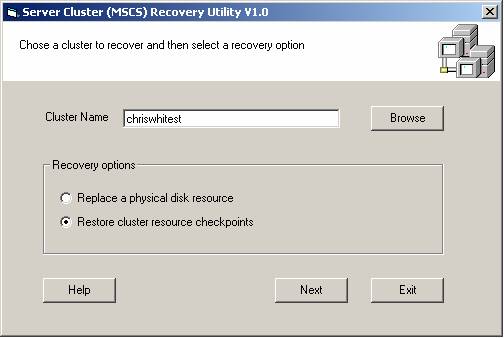
In the Cluster Recovery Utility, specify the appropriate cluster to recover and select the “Restore cluster resource checkpoints” option then click the Next button.
You can use the cluster recovery utility to restore the checkpoint files for either a single resource or for all resources in the cluster. To restore all checkpoint files for all resources in the cluster select the “All resources” option and click the Restore button.
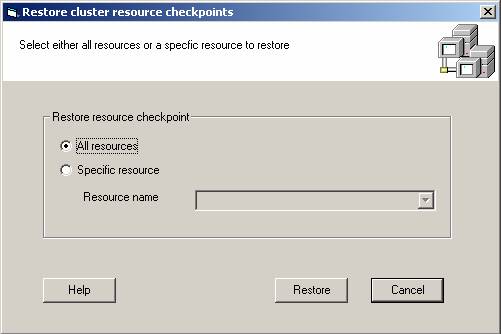
The “All resources” option loops through each resource in turn (regardless of whether the resources are online, offline or failed) in the cluster and re-creates each checkpoint file. Each checkpoint file is populated with the current value of the appropriate registry key from the node that currently owns the resource (in the case of an online resource, this is the node that is currently hosting the resource, in the case of an offline resource, this is the node that is defined as the current owner – visible through Cluster Administrator or the cluster.exe utility).
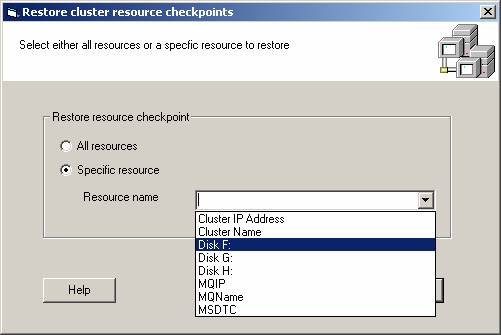
In some cases, re-creating the checkpoint files for a single resource is more appropriate. The Server Cluster Recovery Utility allows a single resource to be restored using the “Specific resource” option. You can either type in a resource name or you can select from all the resources in the cluster using the drop-down menu. Once you have selected a resource, hit the Restore button to re-create the checkpoint files for that resource.