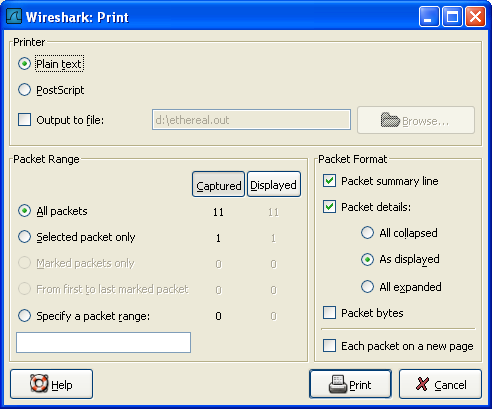
To print packets, select the "Print..." menu item from the File menu. When you do this, Wireshark pops up the Print dialog box as shown in Figure 5.18, “The "Print" dialog box”.
The following fields are available in the Print dialog box:
- Printer
-
This field contains a pair of mutually exclusive radio buttons:
-
Plain Text specifies that the packet print should be in plain text.
-
PostScript specifies that the packet print process should use PostScript to generate a better print output on PostScript aware printers.
-
Output to file: specifies that printing be done to a file, using the filename entered in the field or selected with the browse button.
This field is where you enter the file to print to if you have selected Print to a file, or you can click the button to browse the filesystem. It is greyed out if Print to a file is not selected.
-
Print command specifies that a command be used for printing.
![[Note]](note.png)
Note! These Print command fields are not available on windows platforms.
This field specifies the command to use for printing. It is typically lpr. You would change it to specify a particular queue if you need to print to a queue other than the default. An example might be:
lpr -PmypostscriptThis field is greyed out if Output to file: is checked above.
-
- Packet Range
-
Select the packets to be printed, see Section 5.9, “The Packet Range frame”
- Packet Format
-
Select the output format of the packets to be printed. You can choose, how each packet is printed, see Figure 5.20, “The "Packet Format" frame”
