Serial/IP Quick Start Guide
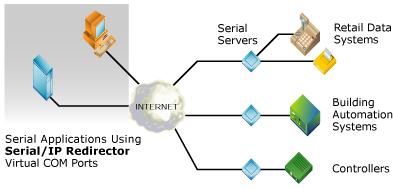
This Quick Start Guide describes how to install and configure the Serial/IP Redirector so that the Windows applications can use virtual COM ports to access networked serial devices.

Configure the Serial Device Server
Make sure that the serial server makes its devices available on a TCP port.
Install the Serial/IP Software
| · | Log in as Administrator. |
| · | Run the Serial/IP setup program. |
| · | Use all default choices. |
| · | The Serial/IP Redirector will begin running. Windows will not need to be restarted. |
Create Virtual COM Ports
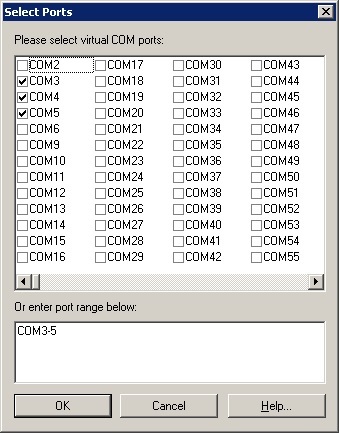
In the Select Ports window, select one or more virtual COM ports, and then click OK.

The Serial/IP Select Ports window
Configure a Virtual COM Port
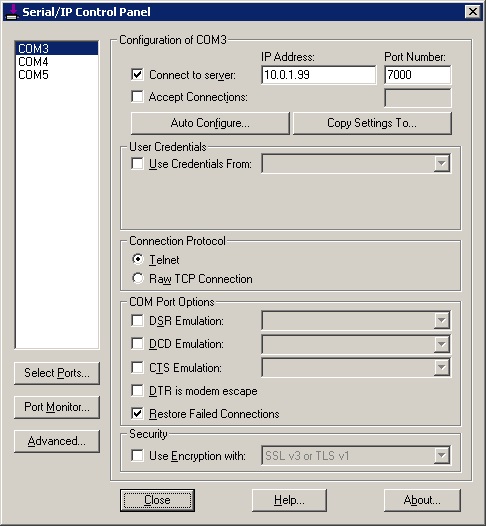
Enter the IP Address of the serial device server. Enter the TCP Port Number that it is listening on.
If the server requires a login, then select the Use Credentials From checkbox. Then in the drop-down list, select Use Credentials Below and enter the Username and Password.

The Serial/IP Control Panel
Run Auto Configure
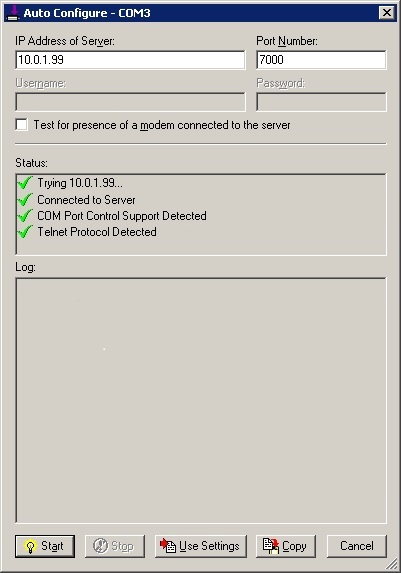
Click Auto Configure. In the Auto Configure window, click Start. When it completes, click Use Settings.
The correct setting will be made for Connection Protocol.

The Serial/IP Auto Configure window
Ensure that Firewall Software Permits Connections
The Serial/IP setup program will add an exception for Serial/IP in the Microsoft Windows Firewall.
If using other firewall software, then manually add exceptions for UDP port 2392 both inbound and outbound, and TCP port 2392 inbound.
If a firewall blocks outbound connections, then also add exceptions for any outbound TCP ports that will be entered under the Port Number field in Serial/IP.
Configure the Application
If using an application that must use a COM port directly, then change its COM port setting to the virtual COM port.
The application should now be using the device on the serial device server.
Having Issues?
| · | Check the settings for any firewall software that may affect connections being used by Serial/IP. |
| · | Review the detailed instructions in the rest of the User Guide. |