5. The case of using limitedfunctions with Serial Flash memory and Internal RAM
7. How to deploy application
.NET Micro Framework has the feature of developing Application using Visual Studio2010.
In this section, the way to deploy application is explained by using Sample application.
7.1 Install .NET Micro Framework SDK
In order to use .NET Micro Framework with Visual Studio, you need to install .NET Micro Framework SDK (MicroFrameworkSDK.msi) into your PC.
7.2 Prepare Sample application
At first, you need to create the application. Please open Visual Studio.
i) Create new project
Select File menu -> New -> Project.
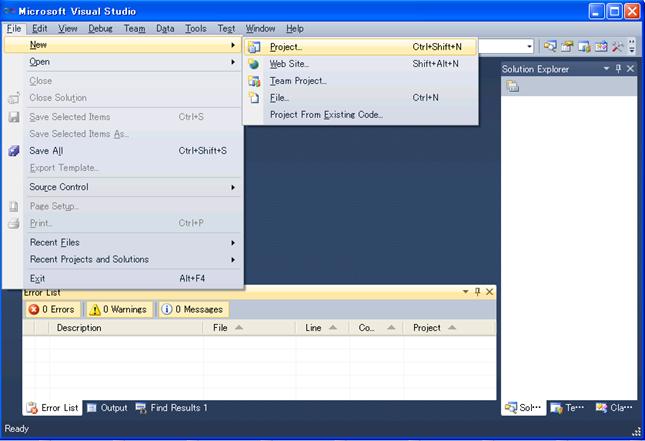
Figure 7.1 Microsoft Visual Studio
Please note, these screens are captured from Visual Studio2010 professional. You will see difference screens and menus in the case of Visual Studio 2010 Express Edition. But, you will find similar features in the menus of Visual Studio 2010 Express Edition.
ii) Select the Project type, Template and project name
Select below,
Project Type: Micro Framework
Template: Console Application
Name: HelloWorld
And press OK button.
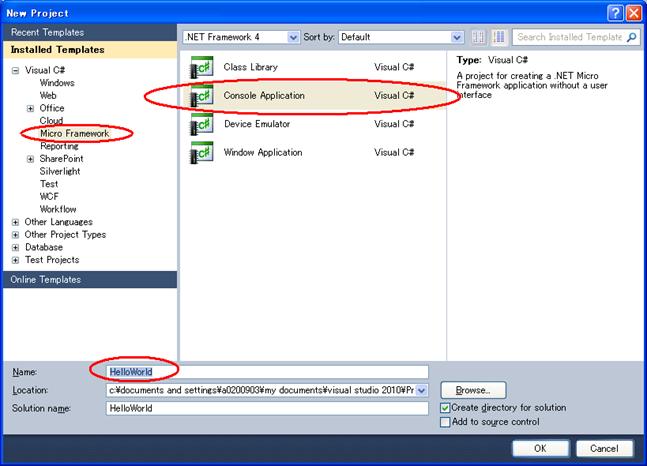
Figure 7.2 New Project
Note depending upon your application please
select the appropriate options. If you are creating a GUI based application it
is advised to select “Window Application” option.
iii) Copy the source file of Sample program into this project
Right click on “HelloWorld” in the Solution Explorer and select Add -> Existing Item….
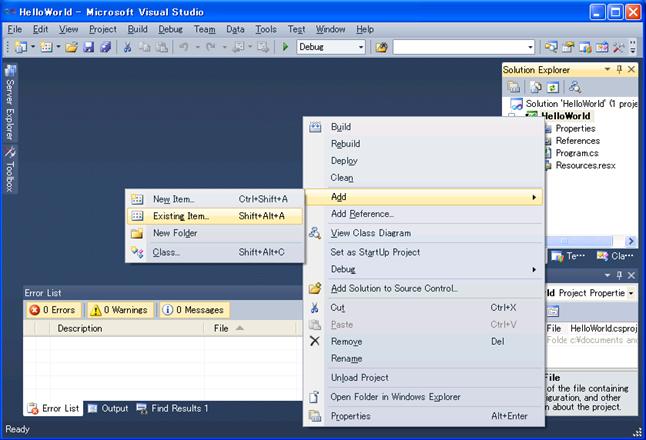
Figure 7.3 Microsoft Visual Studio
Select the below file,
C:\MicroFrameworkPK_v4_1\Product\Sample\HelloWorld\Main.cs
And press Add button.
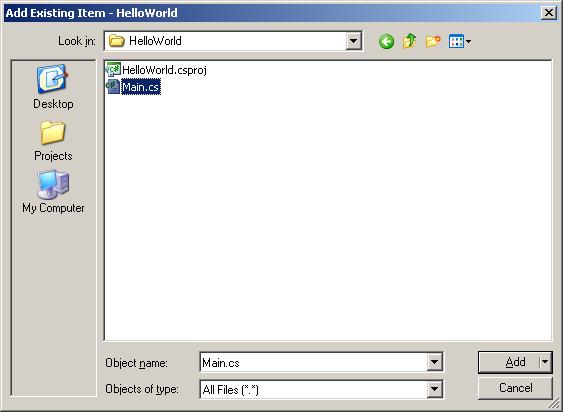
Figure 7.4 Add Existing Item dialog box
iv) Remove unnecessary file
Remove Program.cs file from the HelloWorld project.
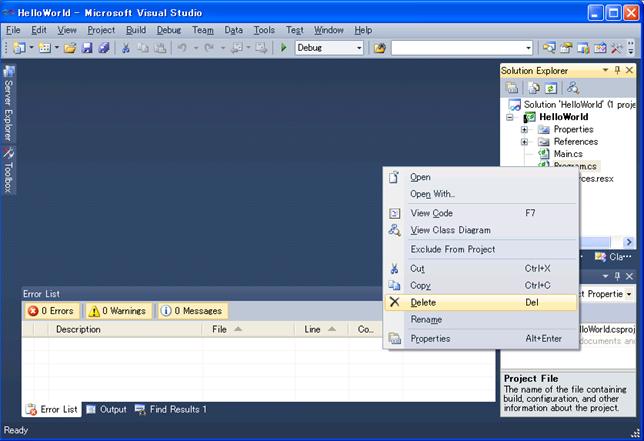
Figure 7.5 Microsoft Visual Studio
v) Build solution
Build Solution by selecting Build Solution menu,
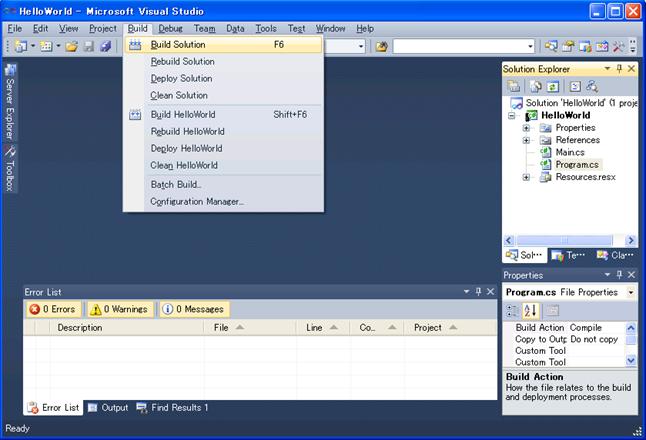
Figure 7.6 Microsoft Visual Studio
Then build shall be completed successfully.
7.3 Deployment and run the application
In order to communicate with visual studio and your board, you need to download TinyCLR into the flash memory on the board.
It is assumed that you have build and downloaded TinyCLR into the flash memory on the board. If not, please build your Porting kit and downloading tinyclr.abs into the flash memory referring to section 4.
i) Change properties for current project.
Select Project menu -> HelloWorld Properties… so that you can modify properties.
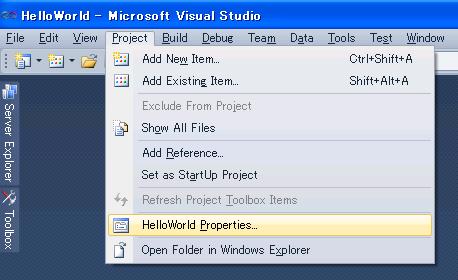
Figure 7.7 Microsoft Visual Studio
Select “.NET Micro Framework” sheet and change deployment option to serial as shown below, save and close this window.
Figure 7.8 Properties…
ii) Re-Build
In order to affect these changing, Re-build is required.
iii) Turn on the board
First, connected the serial terminal of board with that of PC using serial cable and then turn on the board.
iv) Deploying application
Select Build menu -> Deploy Solution.
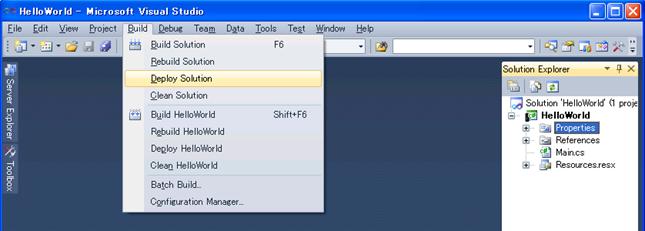
Figure 7.9 Microsoft Visual Studio
Below message is shown up in the output window at the start of deployment process.
“Incrementally deploying assemblies to device”
When deployment gets finished without problem, you can see below message.
“Assemblies successfully deployed to device.”
If you have any trouble please make sure if you use correct flash memory configuration file.
v) Run the application
Select Debug menu -> Start Debugging so that you can see the application running and use break point via Visual Studio.
If the deployment fails, it might be caused by the unexpected data in the Deployment area in Flash memory. One of the way to avoid this is to erase all data in the deployment area using MFDeploy.exe. How to use MFDeploy.exe is described in Section 9.3.
7.4 Big-endian support
Normally, in the initial setting, the reference dlls are supporting Little-Endian. So it is recommended to change the reference dlls to for Big-Endian.
i) Remove the Reference for Little-Endian
Right Click the Reference which you want to remove as shown below (Microsoft.SPOT.Native) and select “Remove” option from the popup menu.
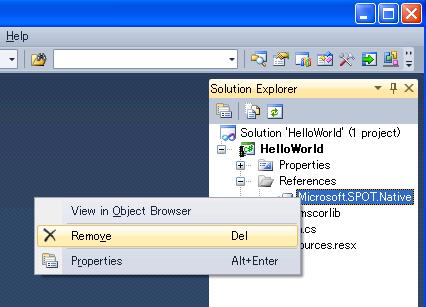
Figure 7.10 Solution Explorer
ii) Add the Reference for Big-Endian
Right Click on the “References” as shown below and select “Add reference…” option form the popup menu.
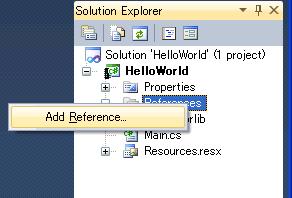
Figure 7.11 Solution Explorer
Then, “Add reference” window shall show up.
Select “Browse” tab and change “Look in” path to below mentioned path:
C:\Program Files\Microsoft .NET Micro Framework\v4.1\Assemblies\be
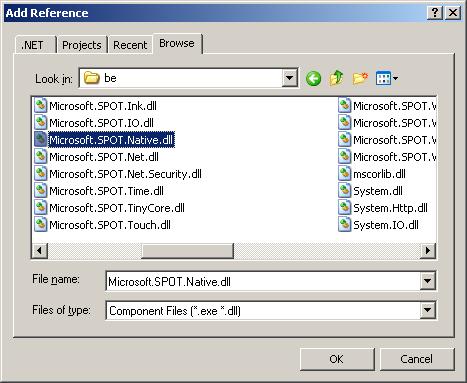
Figure 7.12 Add Reference
Then, select the dll which you want to add. (In this case, select Microsoft.SPOT.Native.dll.)
iii) Make sure that selected reference dll is correct.
Double Click the Reference which you want to see information.

Figure 7.13 Solution Explorer
An object browser tab / window shall be displayed. Verify that you see the correct path information for dll (Microsoft.SPOT.Native) as shown below.
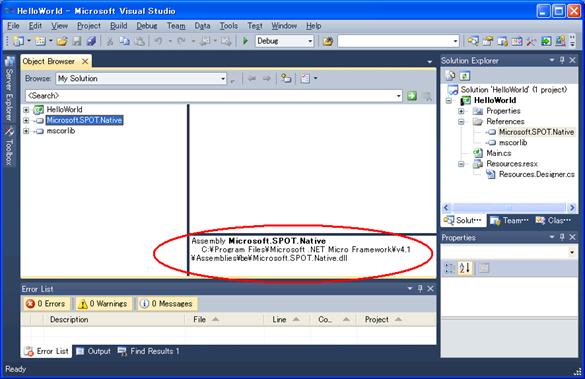
Figure 7.14 Object Browser