


To create a workspace using the Customize User Interface Editor
-
Click
Tools
tab
 Customization
panel
User
Interface
.
Customization
panel
User
Interface
.  At the command prompt,
enter cui.
At the command prompt,
enter cui.
- In
the Customize User Interface Editor, Customize tab, in the Customizations
In <file name> pane, right-click
the Workspaces tree node, and select New Workspace.
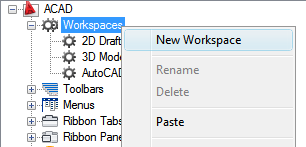
A new, empty workspace (named Workspace1) is placed at the bottom of the Workspaces tree.
- Do
one of the following:
- Enter a new name over the default name Workspace1.
- Right-click Workspace1. Click Rename. Then, enter a new workspace name.
- Click Workspace1, wait, and click again over the workspace’s name again to edit its name in-place.
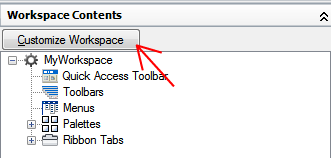
- In
the Workspace Contents pane, click Customize Workspace.
- In
the Customizations In <file name> pane, click
the plus sign (+) next to the Toolbars tree node, Menus tree node,
or Partial CUI files tree node to expand it. NoteThe menu, toolbar, ribbon tabs, and partial CUI file nodes now display check boxes so that you can easily add elements to the workspace.
- Click
the check box next to each menu, toolbar, panels, or partial CUI
file that you want to add to the workspace.

In the Workspace Contents pane, the selected elements are added to the workspace.
- In
the Workspace Contents pane, click Done.
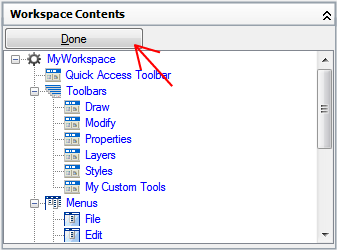
- Click OK.