Step 4. Add DEFINE Command to Format Output
INT012 - Create Excel Document with Template and Formatting
1. Review the DEFINE command of the ExcelReadService in the Integrator Guide:
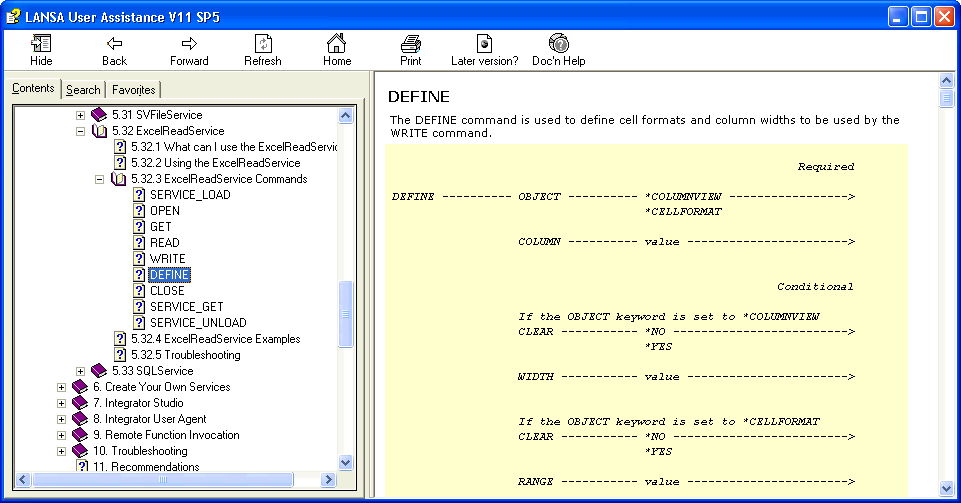
Note that the DEFINE command must be used to set the cell format before using the WRITE command.
2. Based on the information provided in the , consider how to format the Salary column as a number with 2 decimal places. You will usually need to use a number of DEFINE commands to format different aspects of your Excel document. In this case you will need to define OBJECT, COLUMN, RANGE, TYPE and FORMAT keywords. Your added code in iiiFN14 should look like the following:
#jsmxcmd := 'DEFINE OBJECT(*CELLFORMAT) COLUMN(7) RANGE(5,38) TYPE(*NUMBER) FORMAT(*FORMAT3)'
USE BUILTIN(jsmx_command) WITH_ARGS(#jsmxhdle1 #jsmxcmd) TO_GET(#jsmsts #jsmmsg)
Execute Subroutine(CHECK_STS) With_Parms(#JSMXHDLE1)
Remember to add this code before the WRITE command is processed.
3. Recompile function iiiFN14 and retest.
4. Open the document with Excel and check your results. Your results should look like the following:
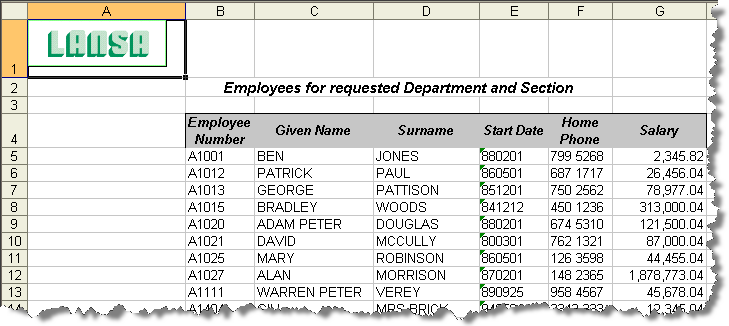
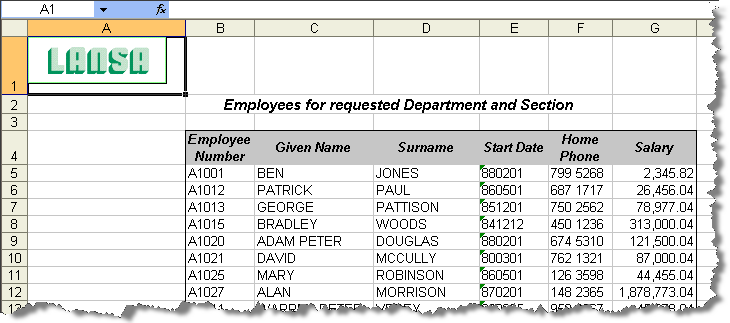
Note that the Salary column is now formatted correctly, but the right hand border for the Salary column has been lost.
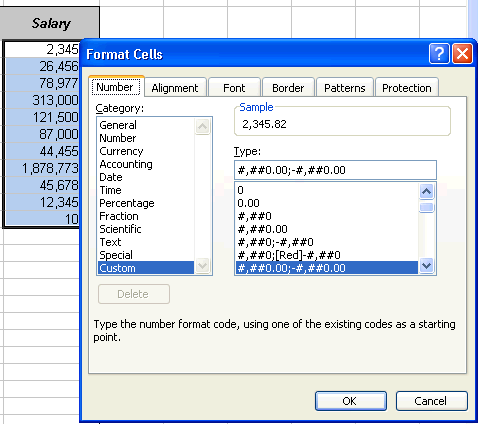
You can check the format of the Salary column by selecting the cells and using the right mouse menu / Format Cells.
5. You can extend the existing DEFINE command to add a thin border to the right hand side of the Salary column. To do this add BORDERTYPE and BORDER keywords to the DEFINE command. Your code should look like the following:
#jsmxcmd := 'DEFINE OBJECT(*CELLFORMAT) COLUMN(7) RANGE(5,38) TYPE(*NUMBER) FORMAT(*FORMAT3) BORDERSTYLE(*THIN) BORDER(*RIGHT)'
USE BUILTIN(jsmx_command) WITH_ARGS(#jsmxhdle1 #jsmxcmd) TO_GET(#jsmsts #jsmmsg)
EXECUTE SUBROUTINE(CHECK_STS)