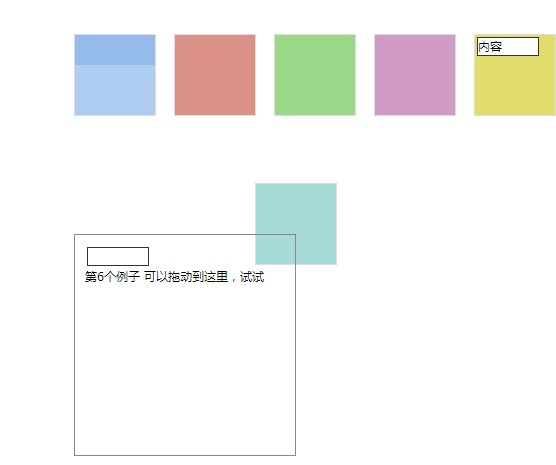
ligerDrag
拖动组件
示例
  1   <script type="text/javascript">
  2
  3         function changeZIndex(obj)
  4         {
  5             $(obj).css("z-index", 2).siblings("div").css("z-index", 1);
  6         }
  7         $(function ()
  8         {
  9             //            $('#rr1,#rr3').ligerDrag({
 10             //                onStartDrag: function (current)
 11             //                {
 12             //                    changeZIndex(current.target[0]);
 13             //                }
 14             //            });
 15
 16             //拖动时不使用代理
 17             var d = $('#rr1').ligerDrag({ proxy: false });
 18
 19             //使用头部,使用默认代理
 20             $('#rr2').ligerDrag({ handler: '#rr2h' });
 21             //使用自定义代理
 22             $('#rr3').ligerDrag({ proxy: function ()
 23             {
 24                 var div = $("<div class='proxy'>proxy</div>");
 25                 div.width($(this).width());
 26                 div.height(30);
 27                 div.appendTo('body');
 28                 return div;
 29             }
 30             });
 31             //使用副本代理
 32             $('#rr4').ligerDrag({ proxy: 'clone' });
 33
 34             //使用副本代理,并归位
 35             var drag5 = $('#rr5').ligerDrag({ proxy: 'clone', revert: true });
 36
 37             //其实这里可以写成:
 38             //var drag5 = new $.ligerui.controls.Drag({ proxy: 'clone', revert: true, target: $('#rr5')[0] });
 39
 40             //绑定一个事件,改变拖动时的鼠标图标,也可以把onStartDrag作为参数传入,用bind的好处是可以多次绑定
 41             drag5.bind('StartDrag', function ()
 42             {
 43                 //这里this就是drag5,组件管理器,类型为$.ligerui.controls.Drag
 44
 45                 //drag5.cursor = 'not-allowed';
 46                 this.cursor = 'not-allowed';
 47             });
 48
 49
 50             //这里利用receive属性定义了一个接收区域
 51             var drag6 = $('#rr6').ligerDrag({ proxy: 'clone', revert: true
 52             , receive: '#receive'
 53             });
 54             drag6.bind('StartDrag', function ()
 55             {
 56                 this.cursor = 'not-allowed';
 57             });
 58             //当进入区域时
 59             drag6.bind('DragEnter', function (receive, source, e)
 60             {
 61                 drag6.cursor = "pointer";
 62                 $(receive).find(".message").html("进入区域");
 63             });
 64             //在区域移动
 65             drag6.bind('DragOver', function (receive, source, e)
 66             {
 67                 $(receive).find(".message").html("在区域移动 " + e.pageX + ":" + e.pageY);
 68             });
 69             //离开区域
 70             drag6.bind('DragLeave', function (receive, source, e)
 71             {
 72                 this.cursor = "not-allowed";
 73                 $(receive).find(".message").html("离开区域");
 74             });
 75             //在区域释放
 76             drag6.bind('Drop', function (receive, source, e)
 77             {
 78                 source.hide();
 79                 $(receive).find(".txt").val(source.find(".txt").val());
 80                 $(receive).find(".message").html("在区域释放");
 81             });
 82
 83         });
 84
 85     </script>
 86     <style type="text/css">
 87         .proxy
 88         {
 89             border: 1px splid #333;
 90             position: absolute;
 91             z-index: 4;
 92             background: #f1f1f1;
 93         }
 94         .box
 95         {
 96             width: 80px;
 97             height: 80px;
 98             border: 1px solid #ddd;
 99         }
100         .txt
101         {
102             margin: 2px;
103             width: 60px;
104             border: 1px solid #333;
105         }
106     </style>
107 </head>
108 <body style="padding: 10px">
109     <div id="rr1" class="box" style="top: 100px; background: #A6DBD8; position: absolute;"></div>
110     <div id="rr2" class="box" style="top: 100px; left: 100px; background: #AFCCF1; position: absolute;">
111         <div id="rr2h" style="width: 100%; height: 30px; background: #95BBEC; line-height: 30px;">
112         </div>
113     </div>
114     <div id="rr3" class="box" style="top: 100px; left: 200px; background: #DA9188; position: absolute;">
115     </div>
116     <div id="rr4" class="box" style="top: 100px; left: 300px; background: #9CD88A; position: absolute;">
117     </div>
118     <div id="rr5" class="box" style="top: 100px; left: 400px; background: #D09CC5; position: absolute;">
119     </div>
120     <div id="rr6" class="box" style="top: 100px; left: 500px; background: #E2DC6B; position: absolute;">
121         <input type="text" class="txt" value="内容" />
122     </div>
123     <div id="receive" style="top: 300px; left: 100px; position: absolute; width: 200px;
124         height: 200px; padding: 10px; border: 1px solid #888;" onSelectStart= "return false">
125         <p><input type="text" class="txt" value="" /></p>
126         <p>第6个例子 可以拖动到这里,试试</p>
127         <p class="message"></p>
128     </div>
129     <div id="message">
130     </div>
131     <div style="display: none">
132     </div>
133 </body>
截图
