1. Overview
From SH7619 EVB NETMF
4. How to build and execute
In this section, we shall describe the way to build, download and execute SH7619 EVB solution available in the porting kit with NOR Flash Memory and SDRAM.
4.1 How to Build
1) Using Command-line prompt, change the directory to “Solutions\SH7619_EVB”
C:\MicroFrameworkPK_v4_1>cd solutions\SH7619_EVB
2) Run
Msbuild dotnetmf.proj /t:build /p:flavor=debug;EnableTcpIp=true;TCP_IP_STACK=LWIP
Flavor:
<debug|release|rtm>
EnableTCPIP : <ture|false>
TCP_IP_STACK : LWIP If you want to use RTIP, don’t need to add TCP_IP_STACK.
If you want to debug your program using E10A-USB Emulator, please specify “debug” for “flavor” option.
4.2 Board switch settings
Set SW1 of the SH7619 EVB board as below to startup from NOR Flash.
|
SW |
Setting |
Function |
|
1 |
ON (Low) |
MD0 |
|
2 |
OFF (High) |
MD1 |
|
3 |
ON (Low) |
MD2 |
|
4 |
ON (Low) |
MD3 |
|
5 |
ON (Low) |
MD5 |
The meaning of above setting is below,
- Clock mode
Clock Mode is MODE2.
Each frequency is below,
- Crystal 15.36MHz
- CPU 15.36MHz
FRQCR register is set by software as 0x1103 so CPU frequency will be 122.88MHz.
- BUS 61.44MHz
- Peripheral 30.72MHz
- CS0 Memory bus width
16 Bit
- Endian
Big endian
4.3 Download using E10A-USB
1) Setup the E10A-USB Emulator
Install the E10A-USB Emulator software into your PC.
During install, you should select the device group for E10A-USB then specify “Super H RISC engine family SH-2 device group”
2) How to start downloading using E10A-USB
Extract the HEW workspace for SH7619 EVB Porting Kit from file SH7619board.zip at any place in your PC.
In the following instructions, we will assume it is installed in “c:\workspace”
Start the Hew with choosing below menu

Figure 4.1 Hew menu
Then Hew will be show up and you can see below dialog box.
Specify the workspace as below, and press OK button.
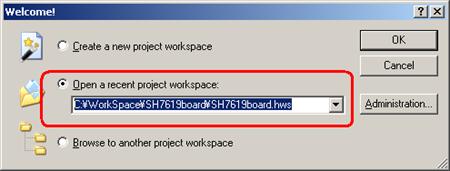
Figure 4.2 Welcome dialog box
In below dialog box, choose “SH7619”.

Figure 4.3 CPU Select dialog box
When below message shows up, power ON the target board and then press OK button.
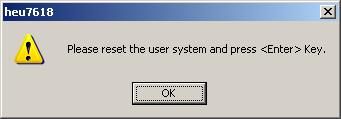
Figure 4.4 heu7618 dialog box
Then Hew/E10A-USB will finish connection with SH7619.
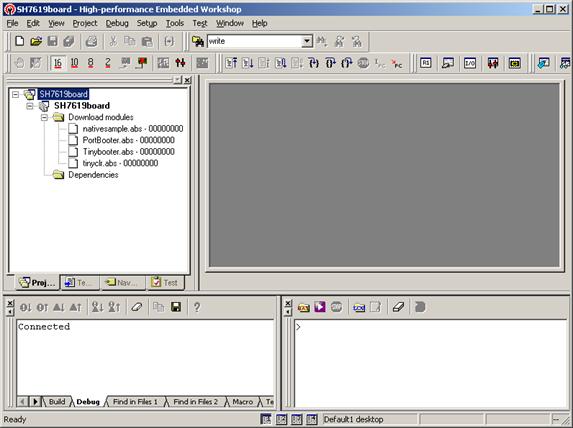
Figure 4.5 Hew window
3) How to download the program to the flash memory
i) Prepare the download module.
Select the [Debug] -> [Debug Settings…] from the menu bar of Hew then below dialog box will show up.

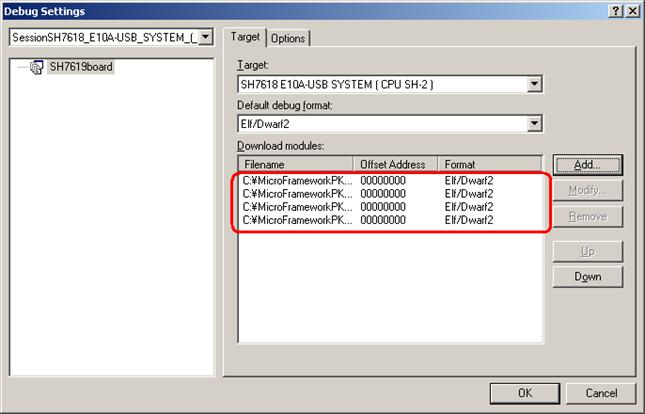
Figure 4.6 Debug Settings dialog box
Here is the definition of download modules. Please change the Path setting for each download module by clicking “Modify” button.
ii) Prepare for downloading to Flash Memory.
Select the [Setup] -> [Emulator] -> [System…] from the menu bar of Hew then “Configuration” dialog box will show up.
Select “Loading flash memory” tab. Then, specify as same as below figure.
 For “File name”, please
specify
For “File name”, please
specify
<Workspace folder>\SH7619board\Tools\4MB\fmtool.mot.
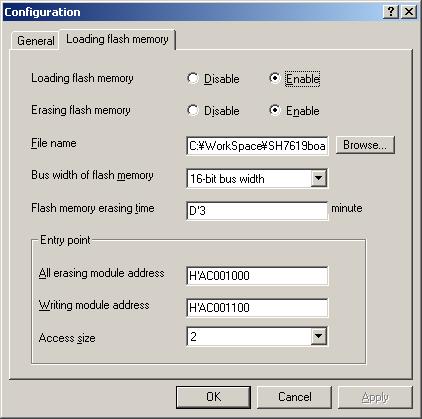
Figure 4.7 Configuration dialog box
ii) CPU and memory initialization
In order to download data to flash properly, CPU and memory should be initialized as following.
-CPU :
Cache must be disabled.
-Memory : SDRAM must be initialized.
In order to initialize them, run the batch file as below,
-Specify the batch file
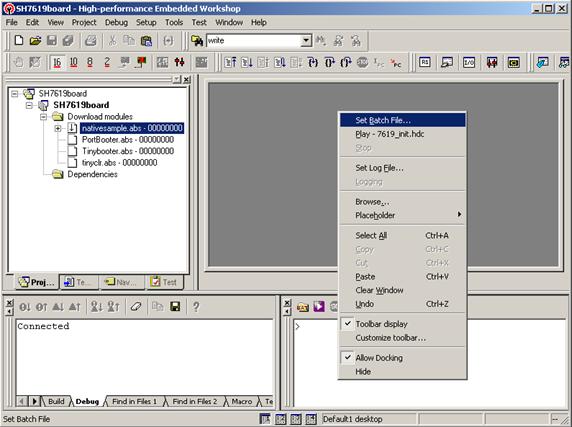
Figure 4.8 Set Batch File
On the command line window, do the right clicking so that the popup menu shows up.
Select “Set Batch file…” and specify the batch file name like below,
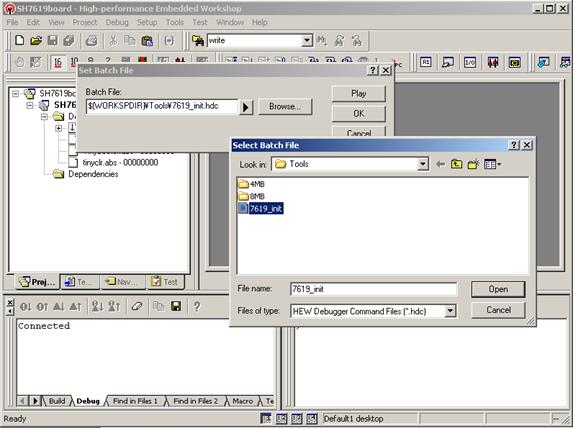
Figure 4.9 Set Batch File
-Run the batch file
After specify the batch file, please press “Play” button so that batch file starts to run.
iii) Download module to Flash
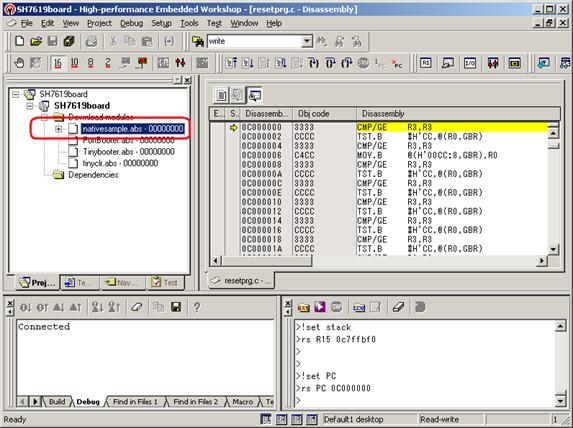
Figure 4.10 Hew window
In order to download, double click on the name of the download module which you want to download to flash. It takes more than 30 seconds.
In the case of downloading TinyCLR, please select tinyclr.abs instead of nativesample.abs.