


Making a connection
Once the connector is installed, you can use it to create, modify, and delete connections to MySQL databases. To create a connection with a MySQL database, perform the following steps:
-
Start Visual Studio, and open the Server Explorer window (View, Server Explorer option in the main Visual Studio menu, or +, hot keys).
-
Right-click on the Data Connections node, and choose the Add Connection... menu item.
-
Add Connection dialog opens. Press the Change button to choose MySQL Database as a data source.
Add Connection Context Menu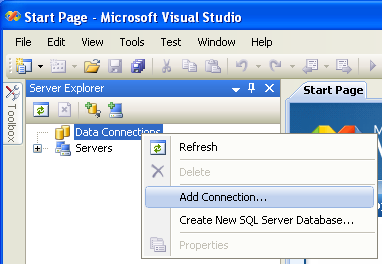
-
Change Data Source dialog opens. Choose MySQL Database in the list of data sources (or the option, if MySQL Database is absent), and then choose .NET Framework Data Provider for MySQL in the combo box of data providers.
Choose Data Source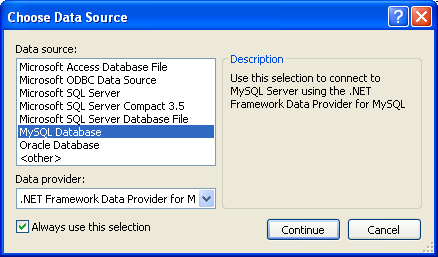
-
Input the connection settings: the server host name (for example, localhost if the MySQL server is installed on the local machine), the user name, the password, and the default schema name. Note that you must specify the default schema name to open the connection.
Add Connection Dialog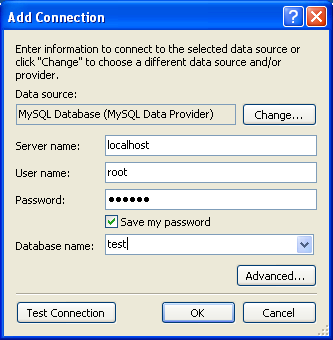
-
You can also set the port to connect with the MySQL server by pressing the Advanced button. To test connection with the MySQL server, set the server host name, the user name, and the password, and press the Test Connection button. If the test succeeds, the success confirmation dialog opens.
-
After you set all settings and test the connection, press OK. The newly created connection is displayed in Server Explorer. Now you can work with the MySQL server through standard Server Explorer GUI.
New Data Connection
After the connection is successfully established, all settings are saved for future use. When you start Visual Studio for the next time, just open the connection node in Server Explorer to establish a connection to the MySQL server again.
To modify and delete a connection, use the Server Explorer context menu for the corresponding node. You can modify any of the settings just by overwriting the existing values with new ones. Note that the connection may be modified or deleted only if no active editor for its objects is opened: otherwise you may loose your data.
Editing Tables
Connector/Net contains a table editor, which enables the visual creation and modification of tables.
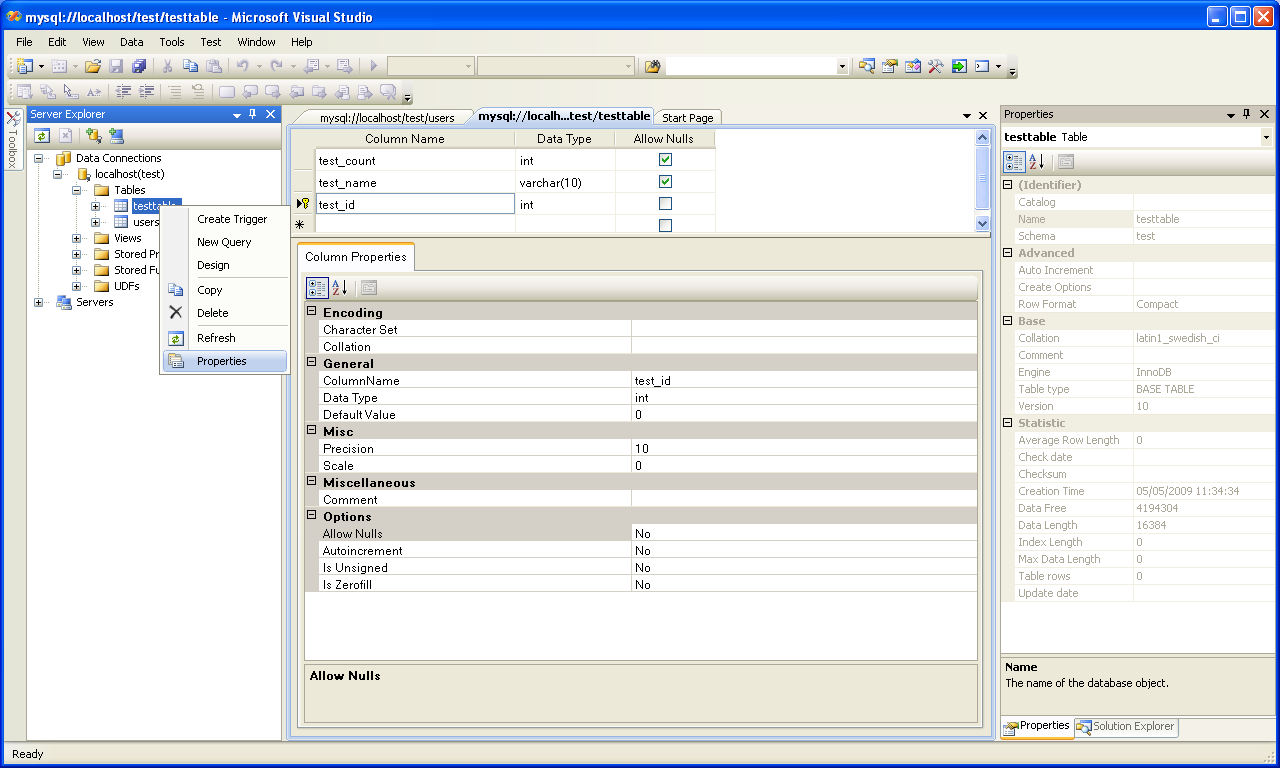
The Table Designer can be accessed through a mouse action on table-type node of Server Explorer. To create a new table, right-click on the node (under the connection node) and choose the Create Table command from the context menu.
To modify an existing table, double-click on the node of the table you wish to modify, or right-click on this node and choose the Design item from the context menu. Either of the commands opens the Table Designer.
The table editor is implemented in the manner of the well-known Query Browser Table Editor, but with minor differences.
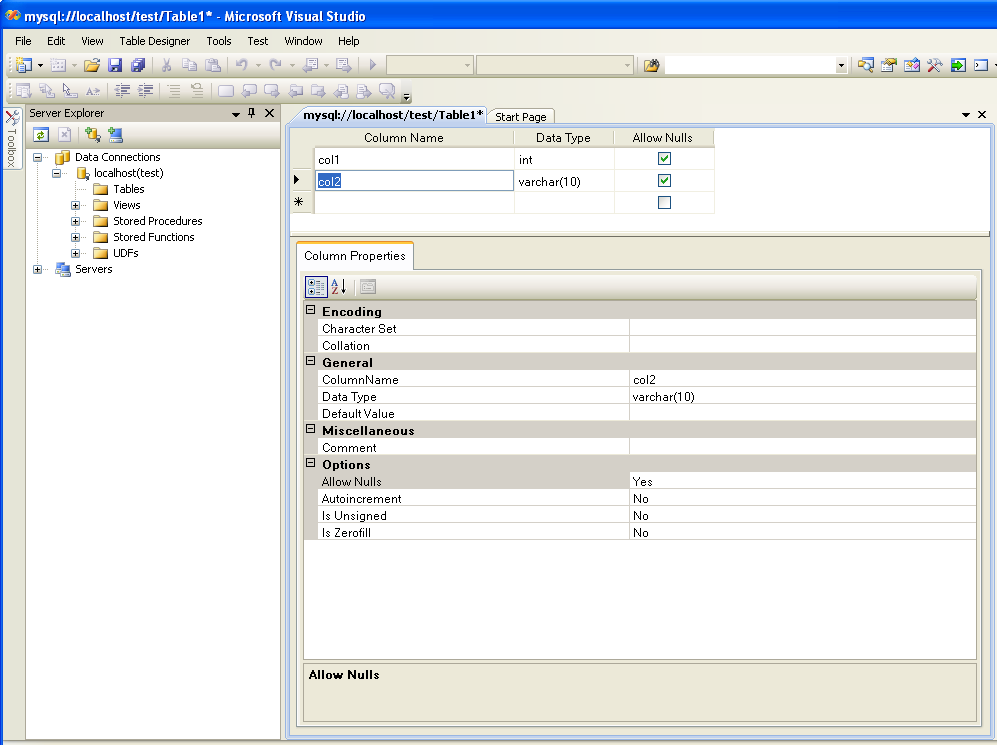
Table Designer consists of the following parts:
-
Columns Editor - a data grid on top of the Table Designer. Use the Columns grid for column creation, modification, and deletion.
-
Indexes tab - a tab on bottom of the Table Designer. Use the Indexes tab for indexes management.
-
Foreign Keys tab - a tab on bottom of the Table Designer. Use the Foreign Keys tab for foreign keys management.
-
Column Details tab - a tab on bottom of the Table Designer. Use the Column Details tab to set advanced column options.
-
Properties window - a standard Visual Studio Properties window, where the properties of the edited table are displayed. Use the Properties window to set the table properties.
Each of these areas is discussed in more detail in subsequent sections.
To save changes you have made in the Table Designer, use either Save or Save All button of the Visual Studio main toolbar, or just press +. If you have not already named the table you will be prompted to do so.
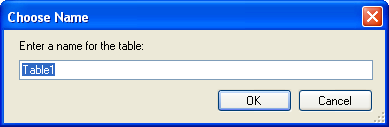
Once created you can view the table in the Server Explorer.

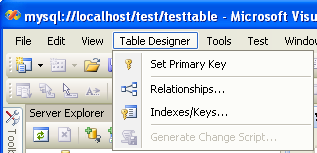
The Table Designer main menu allows you to set a Primary Key column, edit Relationships such as Foreign Keys, and create Indexes.
Column Editor
You can use the Column Editor to set or change the name, data type, default value, and other properties of a table column. To set the focus to a needed cell of a grid, use the mouse click. Also you can move through the grid using and + keys.
To set or change the name, data type, default value and comment of a column, activate the appropriate cell and type the desired value.
To set or unset flag-type column properties (NOT NULL, auto incremented, flags), check or uncheck the corresponding check boxes. Note that the set of column flags depends on its data type.
To reorder columns, index columns or foreign key columns in the Column Editor, select the whole column you wish to reorder by clicking on the selector column on the left of the column grid. Then move the column by using + (to move the column up) or + (to move the column down) keys.
To delete a column, select it by clicking on the selector column on the left of the column grid, then press the button on a keyboard.
Editing Indexes
Indexes management is performed via the dialog.
To add an index, select Table Designer, Indexes/Keys... from the main menu, and click Add to add a new index. You can then set the index name, index kind, index type, and a set of index columns.
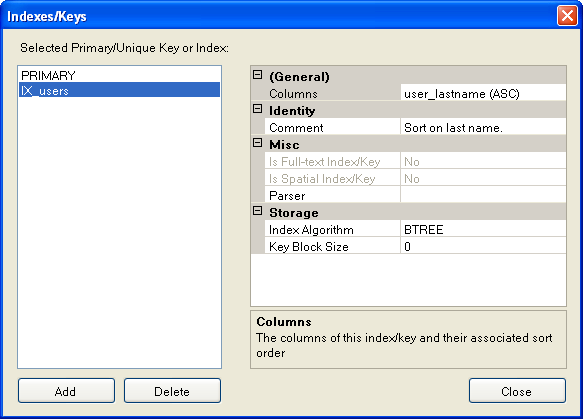
To remove an index, select it in the list box on the left, and click the Delete button.
To change index settings, select the needed index in the list box on the left. The detailed information about the index is displayed in the panel on the right hand side. Change the desired values.
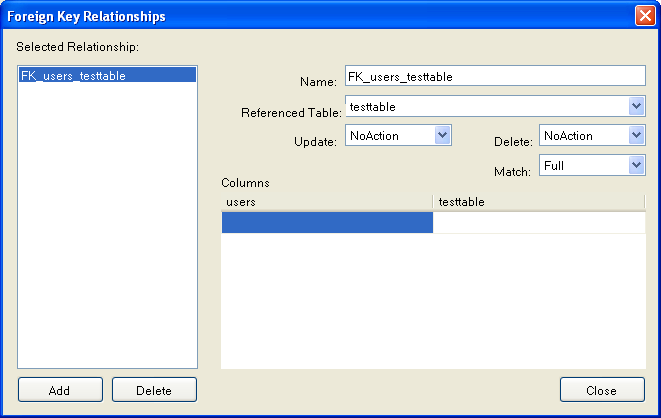
Editing Foreign Keys
Foreign Keys management is performed via the dialog.
To add a foreign key, select Table Designer, Relationships... from the main menu. This displays the dialog. Click Add. You can then set the foreign key name, referenced table name, foreign key columns, and actions upon update and delete.
To remove a foreign key, select it in the list box on the left, and click the Delete button.
To change foreign key settings, select the required foreign key in the list box on the left. The detailed information about the foreign key is displayed in the right hand panel. Change the desired values.
Column Properties
The tab can be used to set column options. In addition to the general column properties presented in the Column Editor, in the tab you can set additional properties such as Character Set, Collation and Precision.
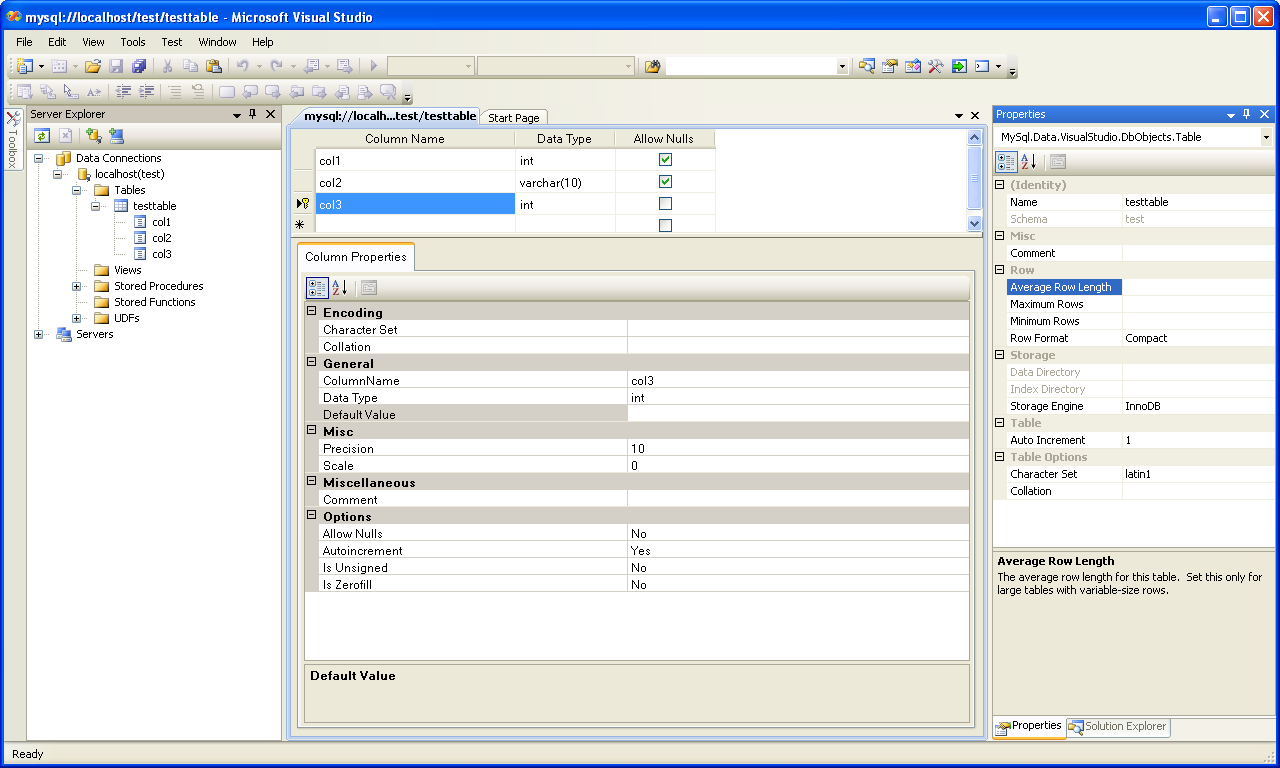
Table Properties
To bring up Table Properties select the table and right click to activate the context menu. Select Properties. The dockable window will be displayed.
The following table properties can be set:
-
Auto Increment
-
Average Row Length
-
Character Set
-
Collation
-
Comment
-
Data Directory
-
Index Directory
-
Maximum Rows
-
Minimum Rows
-
Name
-
Row Format
-
Schema
-
Storage Engine
The property Schema is read only.
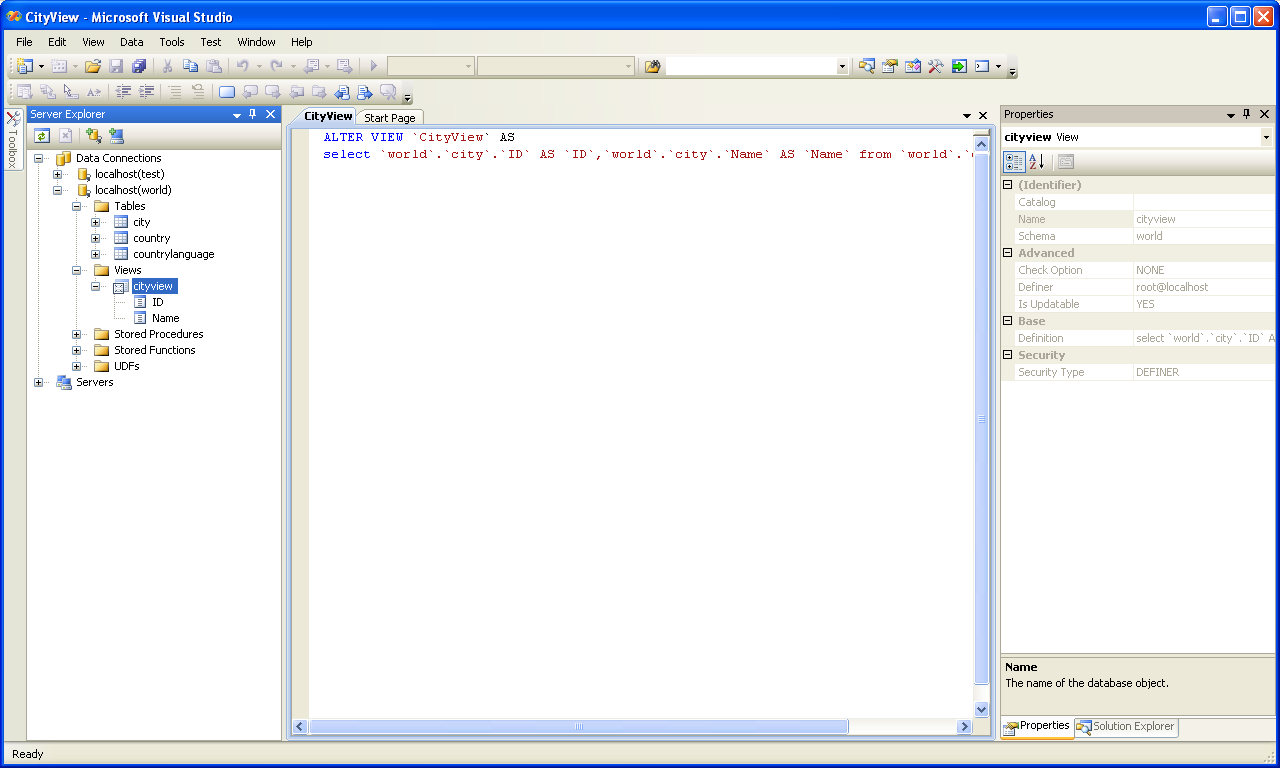
Editing Views
To create a new view, right click the Views node under the connection node in Server Explorer. From the node's context menu, choose the Create View command. This command opens the SQL Editor.

You can then enter the SQL for your view.

To modify an existing view, double click on a node of the view you wish to modify, or right click on this node and choose the Alter View command from a context menu. Either of the commands opens the SQL Editor.
All other view properties can be set in the Properties window. These properties are:
-
Catalog
-
Check Option
-
Definer
-
Definition
-
Definer
-
Is Updateable
-
Name
-
Schema
-
Security Type
Some of these properties can have arbitrary text values, others accept values from a predefined set. In the latter case you set the desired value with an embedded combobox.
The properties Is Updatable and Schema are readonly.
To save changes you have made, use either Save or Save All buttons of the Visual Studio main toolbar, or just press +.
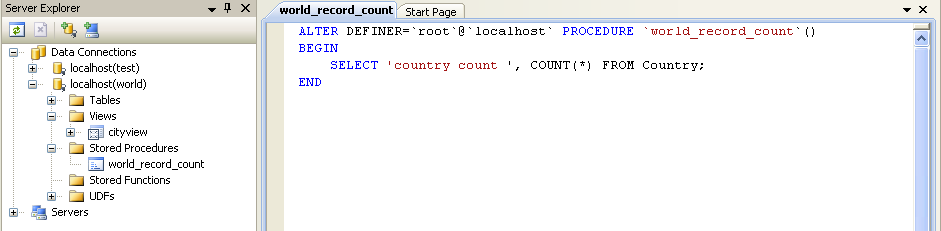
Editing Stored Procedures and Functions
To create a new stored procedure, right-click on the node under the connection node in Server Explorer. From the node's context menu, choose the command. This command opens the SQL Editor.
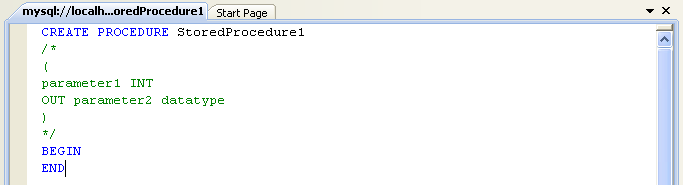
To create a new stored function, right-click on the node under the connection node in Server Explorer. From the node's context menu, choose the command.
To modify an existing stored routine (procedure or function), double-click on the node of the routine you wish to modify, or right-click on this node and choose the command from the context menu. Either of the commands opens the SQL Editor.
To create or alter the routine definition using SQL Editor, type this definition in the SQL Editor using standard SQL. All other routine properties can be set in the Properties window. These properties are:
-
Body
-
Catalog
-
Comment
-
Creation Time
-
Data Access
-
Definer
-
Definition
-
External Name
-
External Language
-
Is Deterministic
-
Last Modified
-
Name
-
Parameter Style
-
Returns
-
Schema
-
Security Type
-
Specific Name
-
SQL Mode
-
SQL Path
-
Type
Some of these properties can have arbitrary text values, others accept values from a predefined set. In the latter case set the desired value using the embedded combo box.
You can also set all the options directly in the SQL Editor, using the standard CREATE PROCEDURE or CREATE FUNCTION statement. However, it is recommended to use the Properties window instead.
To save changes you have made, use either or buttons of the Visual Studio main toolbar, or just press +.
Editing Triggers
To create a new trigger, right-click on the node of the table, for which you wish to add a trigger. From the node's context menu, choose the command. This command opens the SQL Editor.
To modify an existing trigger, double-click on the node of the trigger you wish to modify, or right-click on this node and choose the command from the context menu. Either of the commands opens the SQL Editor.
To create or alter the trigger definition using SQL Editor, type the trigger statement in the SQL Editor using standard SQL.
 Note: Note: |
|---|
|
You should enter only the trigger statement, that is, the part of the CREATE TRIGGER query that is placed after the FOR EACH ROW clause. |
All other trigger properties are set in the Properties window. These properties are:
-
Definer
-
Event Manipulation
-
Name
-
Timing
Some of these properties can have arbitrary text values, others accept values from a predefined set. In the latter case set the desired value using the embedded combo box.
The properties Event Table, Schema, and Server in the Properties window are read only.
To save changes you have made, use either Save or Save All buttons of the Visual Studio main toolbar, or just press +. Before changes are saved, you will be asked to confirm the execution of the corresponding SQL query in a confirmation dialog.
Editing User Defined Functions (UDF)
To create a new User Defined Function (UDF), right-click on the node under the connection node in Server Explorer. From the node's context menu, choose the Create UDF command. This command opens the UDF Editor.
To modify an existing UDF, double-click on the node of the UDF you wish to modify, or right-click on this node and choose the Alter UDF command from the context menu. Either of the commands opens the UDF Editor.
The UDF editor allows you to set the following properties:
-
Name
-
So-name (DLL name)
-
Return type
-
Is Aggregate
There are text fields for both names, a combo box for the return type, and a check box to indicate if the UDF is aggregate. All these options are also accessible via the Properties window.
The property Server in the Properties window is read only.
To save changes you have made, use either Save or Save All buttons of the Visual Studio main toolbar, or just press +. Before changes are saved, you will be asked to confirm the execution of the corresponding SQL query in a confirmation dialog.
Cloning Database Objects
Tables, views, stored procedures, and functions can be cloned using the appropriate Clone command from the context menu: Clone Table, Clone View, Clone Routine. The clone commands open the corresponding editor for a new object: the for cloning a table, and the for cloning a view or a routine.
The editor is filled with values of the original object. You can modify these values in a usual manner.
To save the cloned object, use either Save or Save All buttons of the Visual Studio main toolbar, or just press +. Before changes are saved, you will be asked to confirm the execution of the corresponding SQL query in a confirmation dialog.
Dropping Database Objects
Tables, views, stored routines, triggers, and UDFs can be dropped with the appropriate Drop command selected from its context menu: Drop Table, Drop View, Drop Routine, Drop Trigger, Drop UDF.
You will be asked to confirm the execution of the corresponding drop query in a confirmation dialog.
Dropping of multiple objects is not supported.
Using the ADO.NET Entity Framework
Connector/NET 6.0 introduced support for the ADO.NET Entity Framework. ADO.NET Entity Framework was included with .NET Framework 3.5 Service Pack 1, and Visual Studio 2008 Service Pack 1. ADO.NET Entity Framework was released on 11th August 2008.
ADO.NET Entity Framework provides an Object Relational Mapping (ORM) service, mapping the relational database schema to objects. The ADO.NET Entity Framework defines several layers, these can be summarized as:
-
Logical - this layer defines the relational data and is defined by the Store Schema Definition Language (SSDL).
-
Conceptual - this layer defines the .NET classes and is defined by the Conceptual Schema Definition Language (CSDL)
-
Mapping - this layer defines the mapping from .NET classes to relational tables and associations, and is defined by Mapping Specification Language (MSL).
Connector/NET integrates with Visual Studio 2008 to provide a range of helpful tools to assist the developer.
A full treatment of ADO.NET Entity Framework is beyond the scope of this manual. You are encouraged to review the
Tutorials on getting started with ADO.NET Entity Framework are available. See Tutorial: Using an Entity Framework Entity as a Windows Forms Data Source and Tutorial: Databinding in ASP.NET using LINQ on Entities.
MySQL Website Configuration Tool
6.1 introduced the MySQL Website Configuration Tool. This is a facility available in Visual Studio that allows you to configure the Membership, Role, Session State and Profile Provider, without having to resort to editing configuration files. You simply run the tool, set your configuration options, and the tool will modify your web.config file accordingly.
The MySQL Website Configuration Tool appears as a small icon on the Solution Explorer toolbar in Visual Studio, as show by the following screenshot:
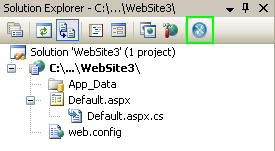
Clicking on the Website Configuration Tool icon launches the wizard and displays the first screen:
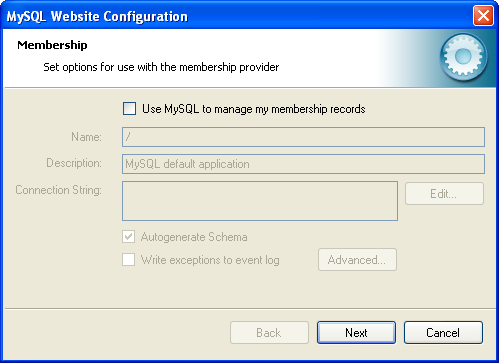
This allows you to enable use of the MySQL Membership Provider. Simply click the checkbox to enable this. You can now enter the name of the application that you are creating the configuration for. You can also enter a description for the application.
You can then click the Edit... button to launch the Connection String Editor:
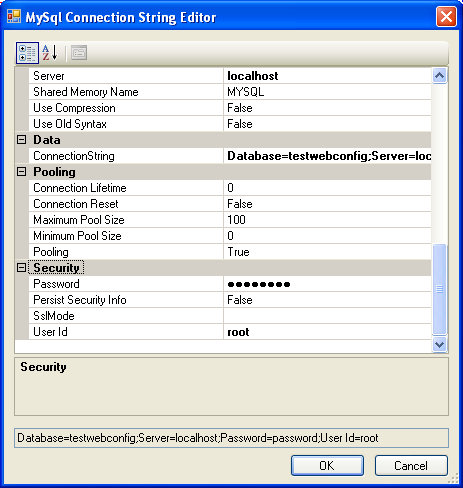
Note that if you have already defined a connection string for the providers manually in web.config, or previously using the tool, this will be automatically loaded and displayed, and can then be modified in this dialog.
You can also ensure that the necessary schema are created automatically for you by selecting the Autogenerate Schema checkbox. These schema are used to store membership information. The database used to storage is the one specified in the connection string.
You can also ensure that exceptions generated by the application will be written to the event log by selecting the checkbox.
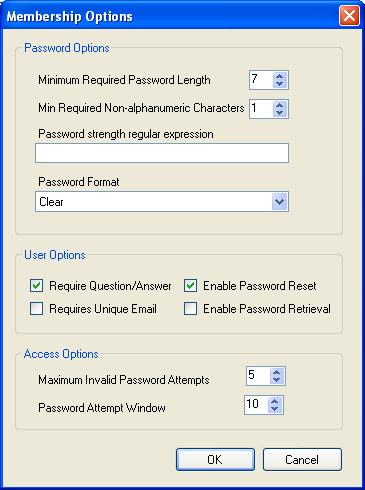
Clicking the Advanced... button launches a dialog that allows you to set Membership Options. These options dictate such variables as password length required when a user signs up, whether the password is encrypted and whether the user can reset their password or not.
Once information has been set up as required for configuration of the Membership Provider the Next button can be clicked to display the Roles Provider screen:
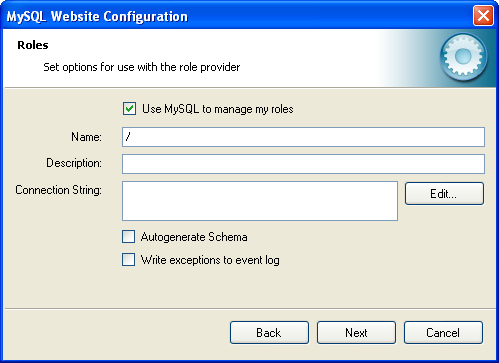
Again the connection string can be edited, a description added and Autogenerate Schema can be enabled before clicking Next to go to the Profiles Provider screen:
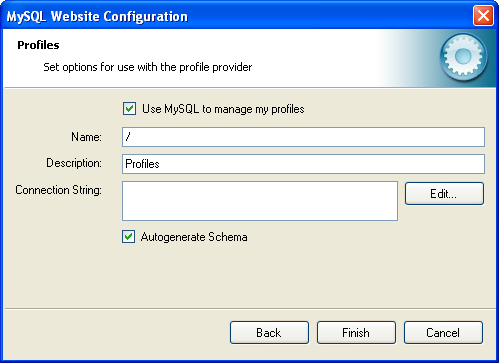
This screen display similar options to the previous screens.
Click Next to proceed to the Session State configuration page:
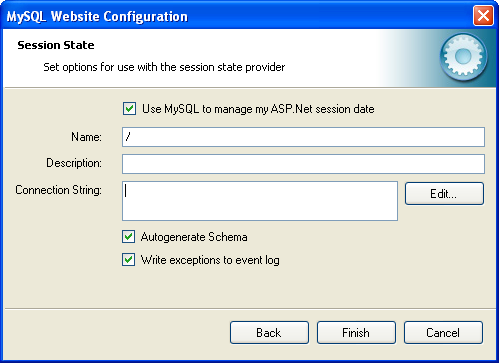
Once you have set up the Session State Provider as required, click Finish to exit the wizard.
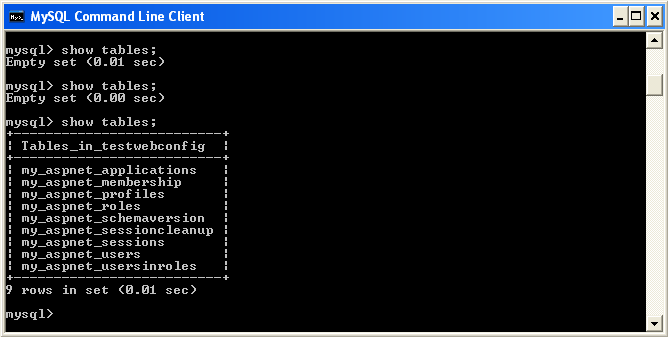
At this point it is necessary to select the Authentication Type to From Internet. This can be done by launching the ASP.NET Configuration Tool, and selecting the Security tab. Click the Select authentication type link and ensure that the From the internet radio button is selected. You can now examine the database you created to store membership information. All the necessary tables will have been created for you:

Send comments on this topic to [email protected]
© 2004-2008 MySQL AB, 2008-2009 Sun Microsystems, Inc. All rights reserved.