How to use Demo Scenes
From GUI Animator for Unity UI
In case you want to see video tutorial for the same topic,https://youtu.be/CZwStQ_VbN4 .
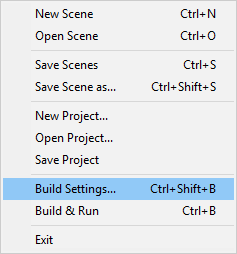
1) Unity Menu, select Top
Menu->Edit->Build
Settings.
Hot keys, Control+Shift+B on Windows
or Command+Shift+B
on
Mac.
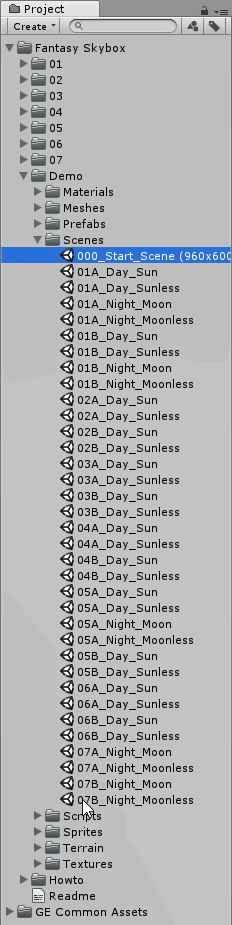
2) Project tab, expand Fantasy Skybox/Demo/Scenes folder.
3) Drag all demo scene files into Scene In Build on Build Settings dialog.
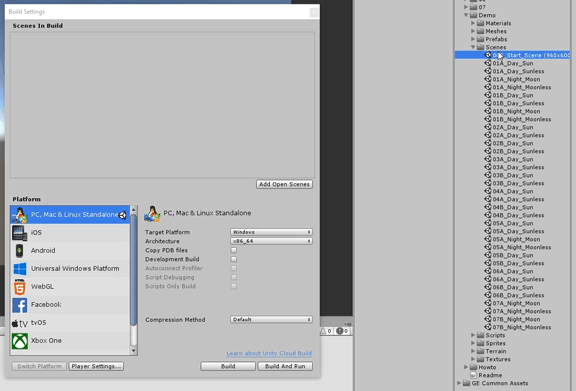
4) Close Build Settings dialog.
5) Project tab, open 000_Start_Scene scene. This is start scene where contains sample script, it will load others when you press Play button. Other scenes are for each skybox container.
6) In Hierarchy tab, select Canvas - UI .
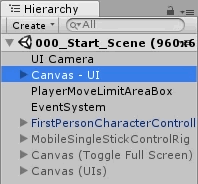
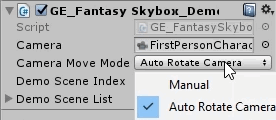
7) In Inspector tab, there are Camera Mode where you can toggle Manual or Auto Mode .
8) Press Play button.
Camera automatically rotates around when you select Auto Rotate Camera in Camera Mode. Use Left and Right arrow keys to change skybox, Spacebar to switch to Manual mode.
In Manual mode, you use mouse to turn and tilt, Left and Right arrow keys to change skybox, Spacebar to switch to Auto Rotate Camera mode.
9) Notice that each scene has differetn Light and Skybox settings. To access settings, select Mainmenu, WIndows, Lighing and Settings.
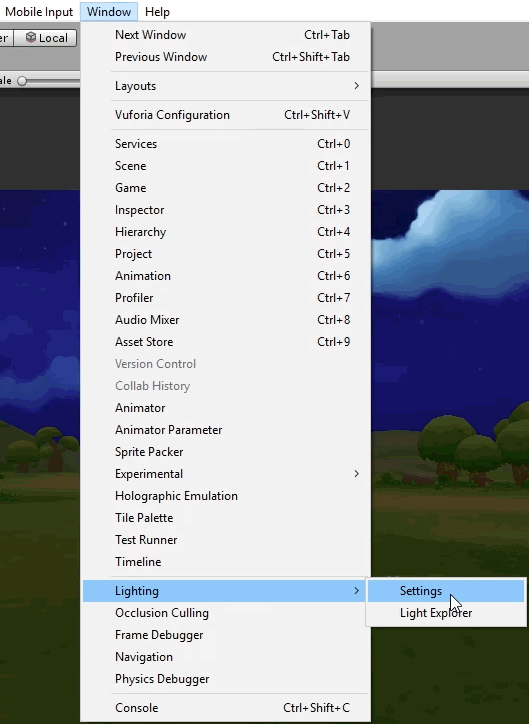
10) In Lighting dialog you will find Environment parameters such as what skybox is using for the current scene or what color for Ambient. You can use this parameter as a guide for scenes of your games.

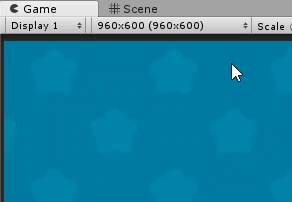
The following steps are optionals, just in case you want to change the Game tab resolution to match with our demo scenes.
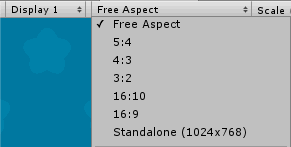
1) Add 960x600 resolution to the Game tab.
1.1) Click resolution dropdown-list on Game tab.
1.2) Click the small Plus(+) button.
1.3) Dialog appears.
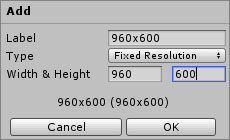
• Label text area, type 960x600 .
• Type list box, select Fixed Resolution .
• Width & Height , type 960 and 600 .
• Click OK button.1.4) Click OK.
2) Change resolution of Game tab to 960x600px.
2.1) Click on drop down list in Game tab.
2.2) Select 960x600 item.