Encryption Instructions
Prerequisites
You should already have run the Scan process on the UNIX host system.
Outline of this Step

|
|

|
|
Scan Files |
Encrypt |
SEKUNF.ZIP/ SEKUNF.SCK |
1. Encrypt the Scan File(s)
Copy the Scan file(s) to an empty directory on your PC. The number of Scan files could be one only (sekunf.z) or 20-25 text files (refer note in the Scan Instructions).
The encrypted file SEKUNF.ZIP or SEKUNF.SCK will be written to the same
directory.
Notes:
For enhanced security, we recommend that you enable SekChek’s ‘Public Key Encryption’ features. For additional information, refer to SekChek's Public Key Encryption.
If 'Public Key Encryption' is enabled, SekChek will create an encrypted file named SEKUNF.SCK. This file can only be decrypted with SekChek’s Private Key.
If 'Public Key Encryption' is not enabled, SekChek will create an encrypted file named SEKUNF.ZIP.
SekChek will also recognise extended filenames (e.g. SEKUNF MyHost 20070316.Z) as long as the filename begins with SEKUNF.
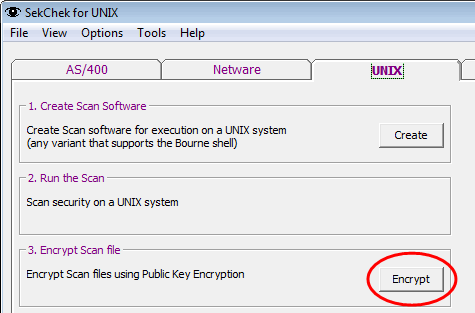
Select Encrypt in the SekChek for UNIX application.
Follow the instructions on the screen… Select the Scan file you want to encrypt…
Click Encrypt…
You will be prompted to enter basic information about your (client) organisation and your secret password that will be used to encrypt the report that is sent back to you.
Click OK…
We strongly recommend that, for enhanced high security, the SekChek Public/Private Key Encryption option is used. For additional information, refer to SekChek's Public Key Encryption.