


- Click Tools
tab
 Customization
panel User
Interface.
Customization
panel User
Interface.  At the command prompt,
enter cui.
At the command prompt,
enter cui. - In
the Customize User Interface Editor, Customize tab, in the Customizations
In <file name> pane, right-click
Toolbars. Click New Toolbar.
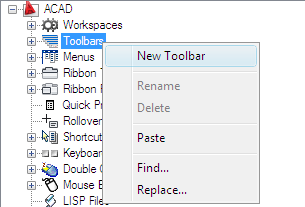
A new toolbar (named Toolbar1) is placed at the bottom of the Toolbars tree.
- Do
one of the following:
- Enter a new name over the default name Toolbar1.
- Right-click Toolbar1. Click Rename. Enter a new toolbar name.
- Click Toolbar1, wait, and click again over the toolbar’s name again to edit its name in-place.
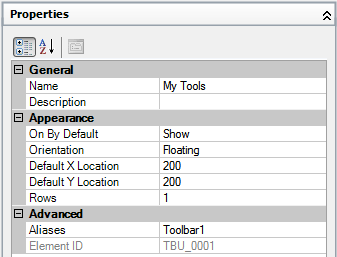
- Select
the new toolbar in the tree view, and update the Properties pane:
- In the Description box, enter a description for the toolbar.
- In the On By Default box, click Hide or Show. If you choose Show, this toolbar will be displayed in all workspaces.
- In the Orientation box, click Floating, Top, Bottom, Left, or Right.
- In the Default X Location box, enter a number.
- In the Default Y Location box, enter a number.
- In the Rows box, enter the number of rows for an undocked toolbar.
- In the Aliases box, enter an alias for the toolbar.
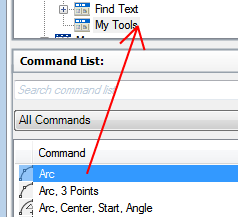
- In
the Command List pane, drag the command you want to add to a location
just below the name of the toolbar in the Customizations In <file name> pane.
- Click OK.